The DUO Tiny is my smallest project yet. As a result, the DUO Tiny is easy to construct.
You will need all of the parts below to build a DUO Tiny. Excluding the miscellaneous parts, the total cost should be around $25.
I probably don't need to say this, but read everything carefully!
(x1) ATTiny 8 bit microcontroller
(x1) 64+ KB EEPROM
Or:
24FC512-I/P (also seems to be compatible, but make sure to ground pin 1.)
(x1) 102 by 64 LCD
(x4) Tactile push buttons
(x1) 14 pin IC socket
(x1) 8 pin IC socket
(x5) 100 kOhm resistor
(x3) 1 microfarad capacitor
(x2) 4 pin header
(x2) 4 pin socket
(x1) 2 AAA battery holder
Miscellaneous components include a circuit board, Arduino UNO, and jumper wire. It is possible to use a generic printed circuit board for the DUO Tiny. My second prototype uses this type of board.
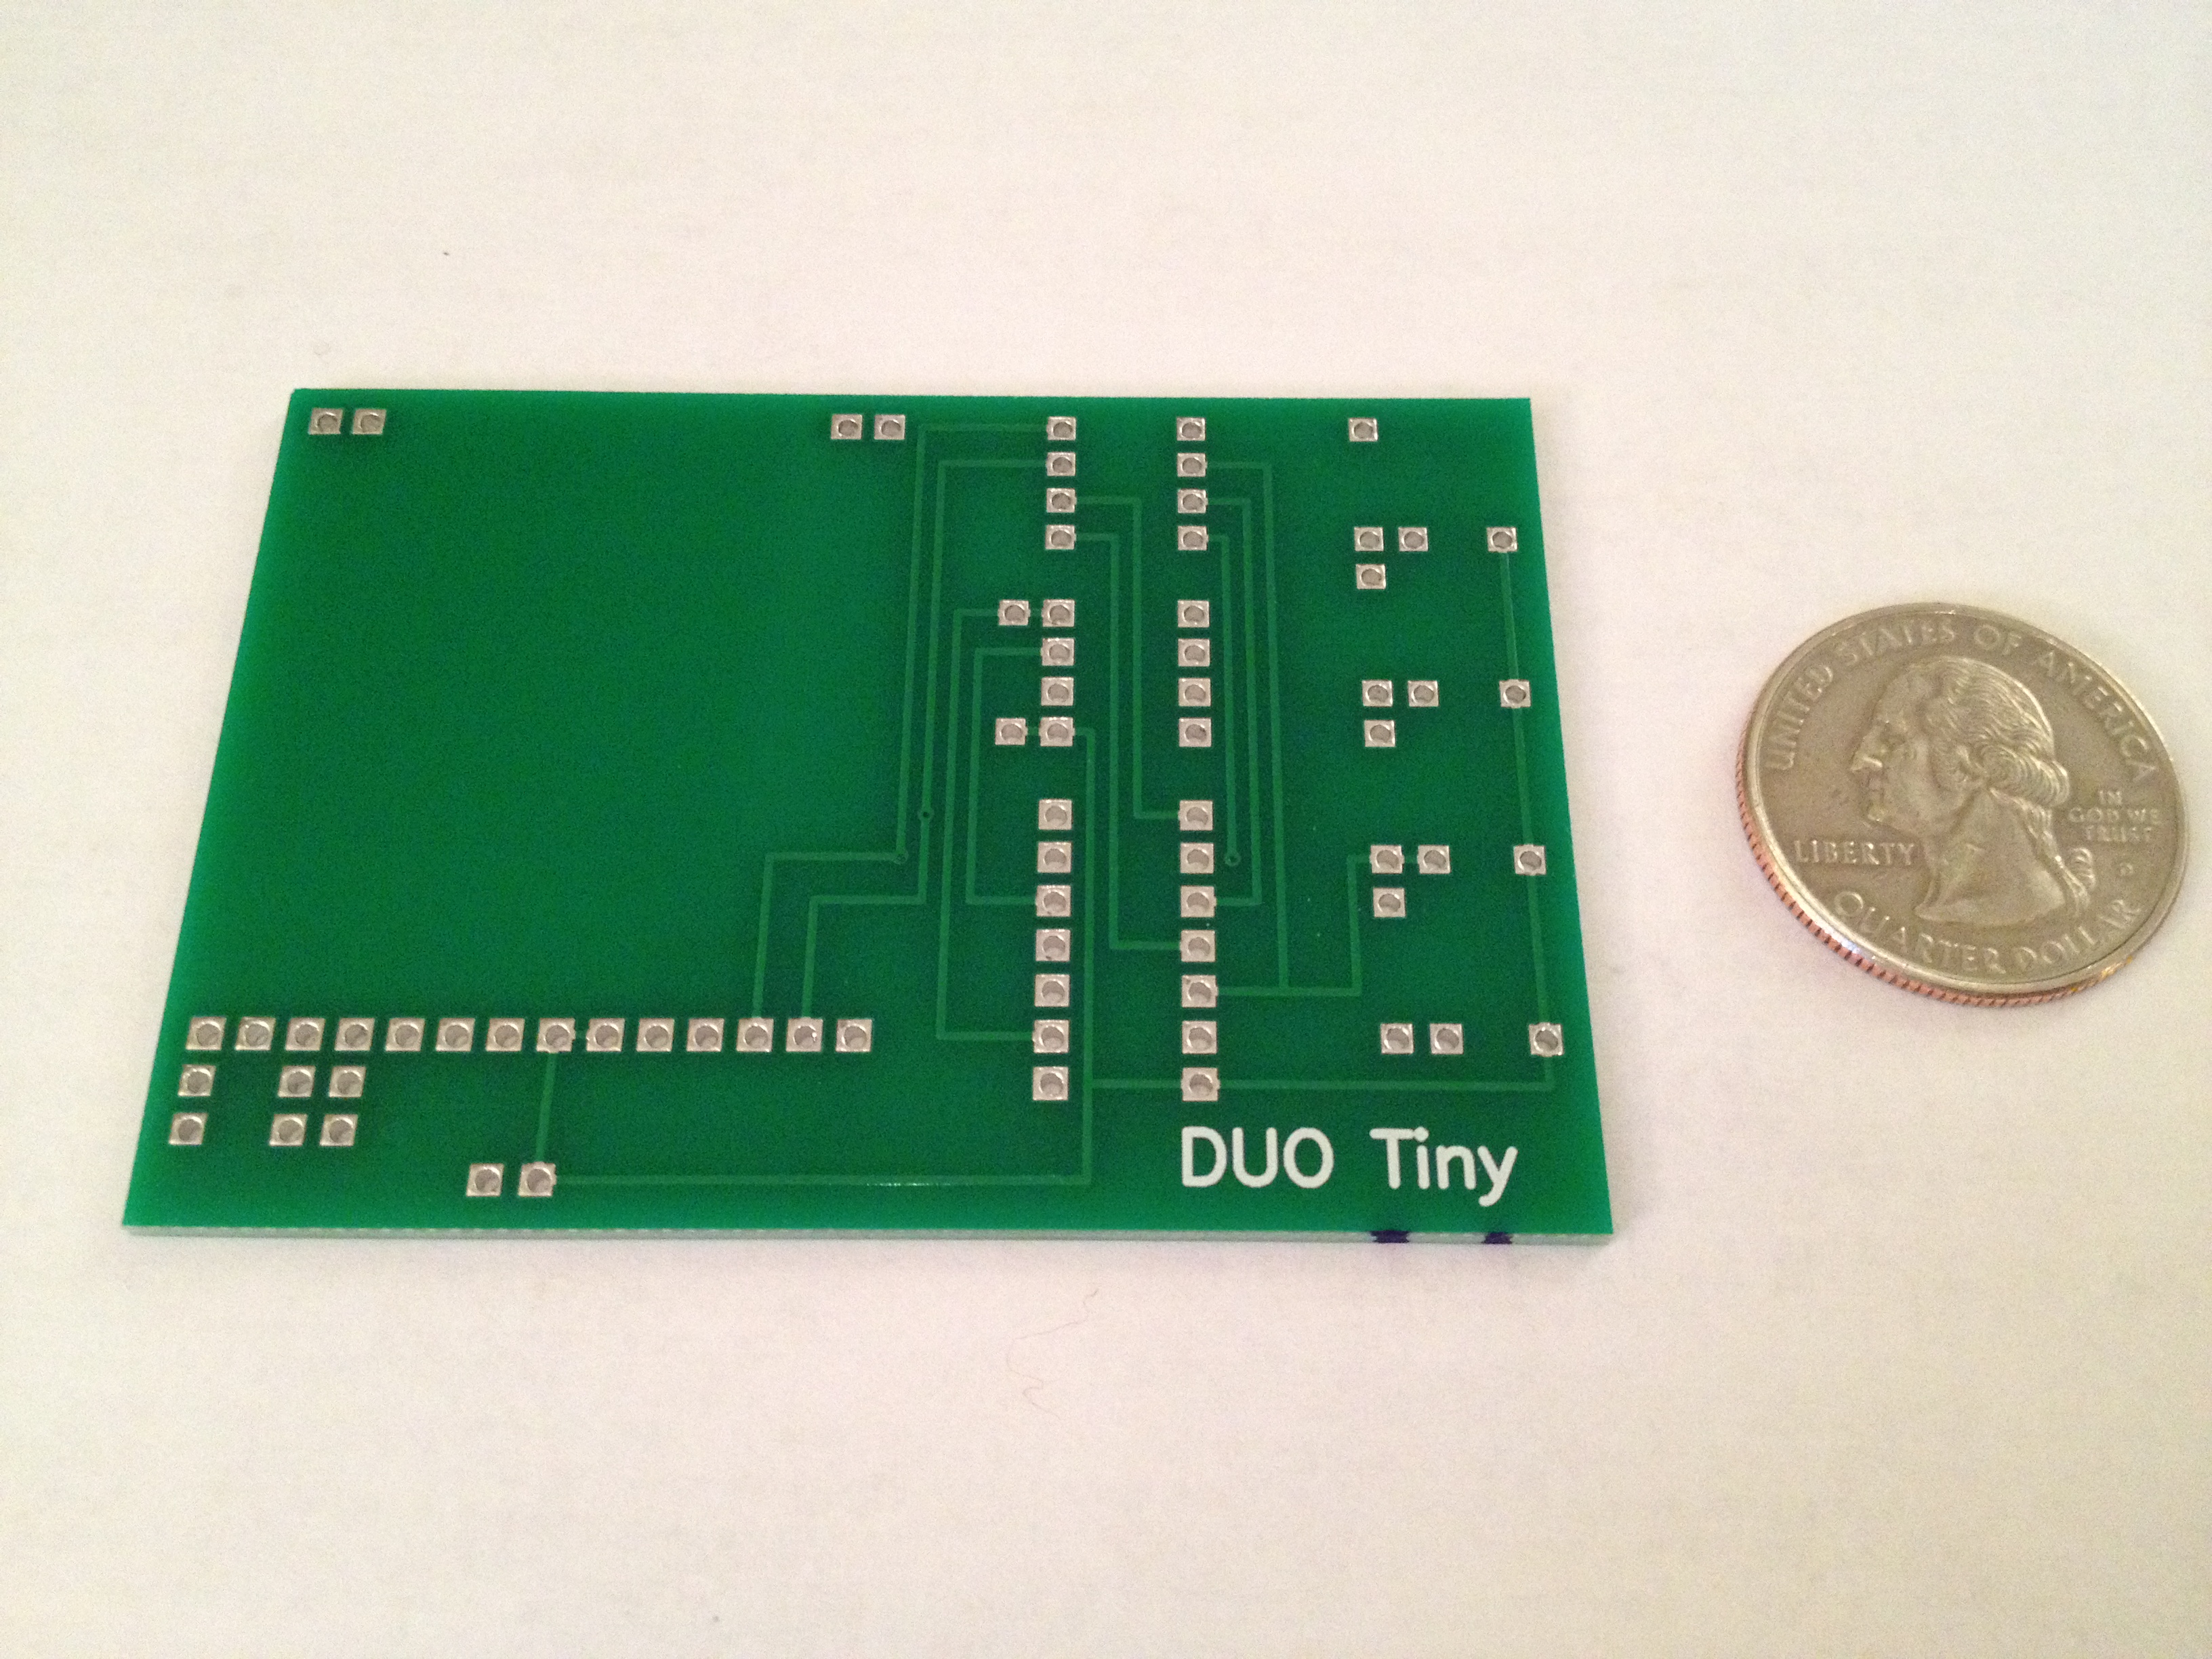
However, to produce a smaller device, a custom printed circuit board is recommended. Here is a picture of the custom PCB which I have designed. I have several extra boards available. You may purchase one for $20. If you are interested, please send an email to esperantanaso at gmail.
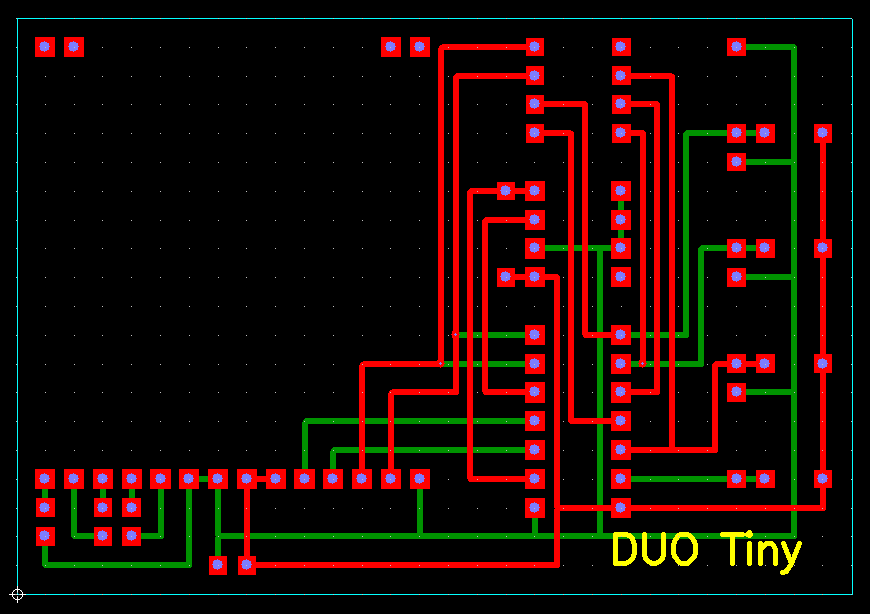
This guide will assume that you have the same PCB as my final DUO Tiny device. Note that my prototypes use a different wiring scheme than the final device. If you are using a generic PCB, please wire the board according to my custom PCB schematic.
Solder each component into your PCB. Use this picture of the board to see where each part should be placed. If you want soldering tips, please refer to this video:
How and WHY to Solder Correctly
Some important notes:
- Do NOT solder chips directly into the board. Heat can caused damage to integrated circuits. First solder in an IC socket, then plug in the chip afterward.
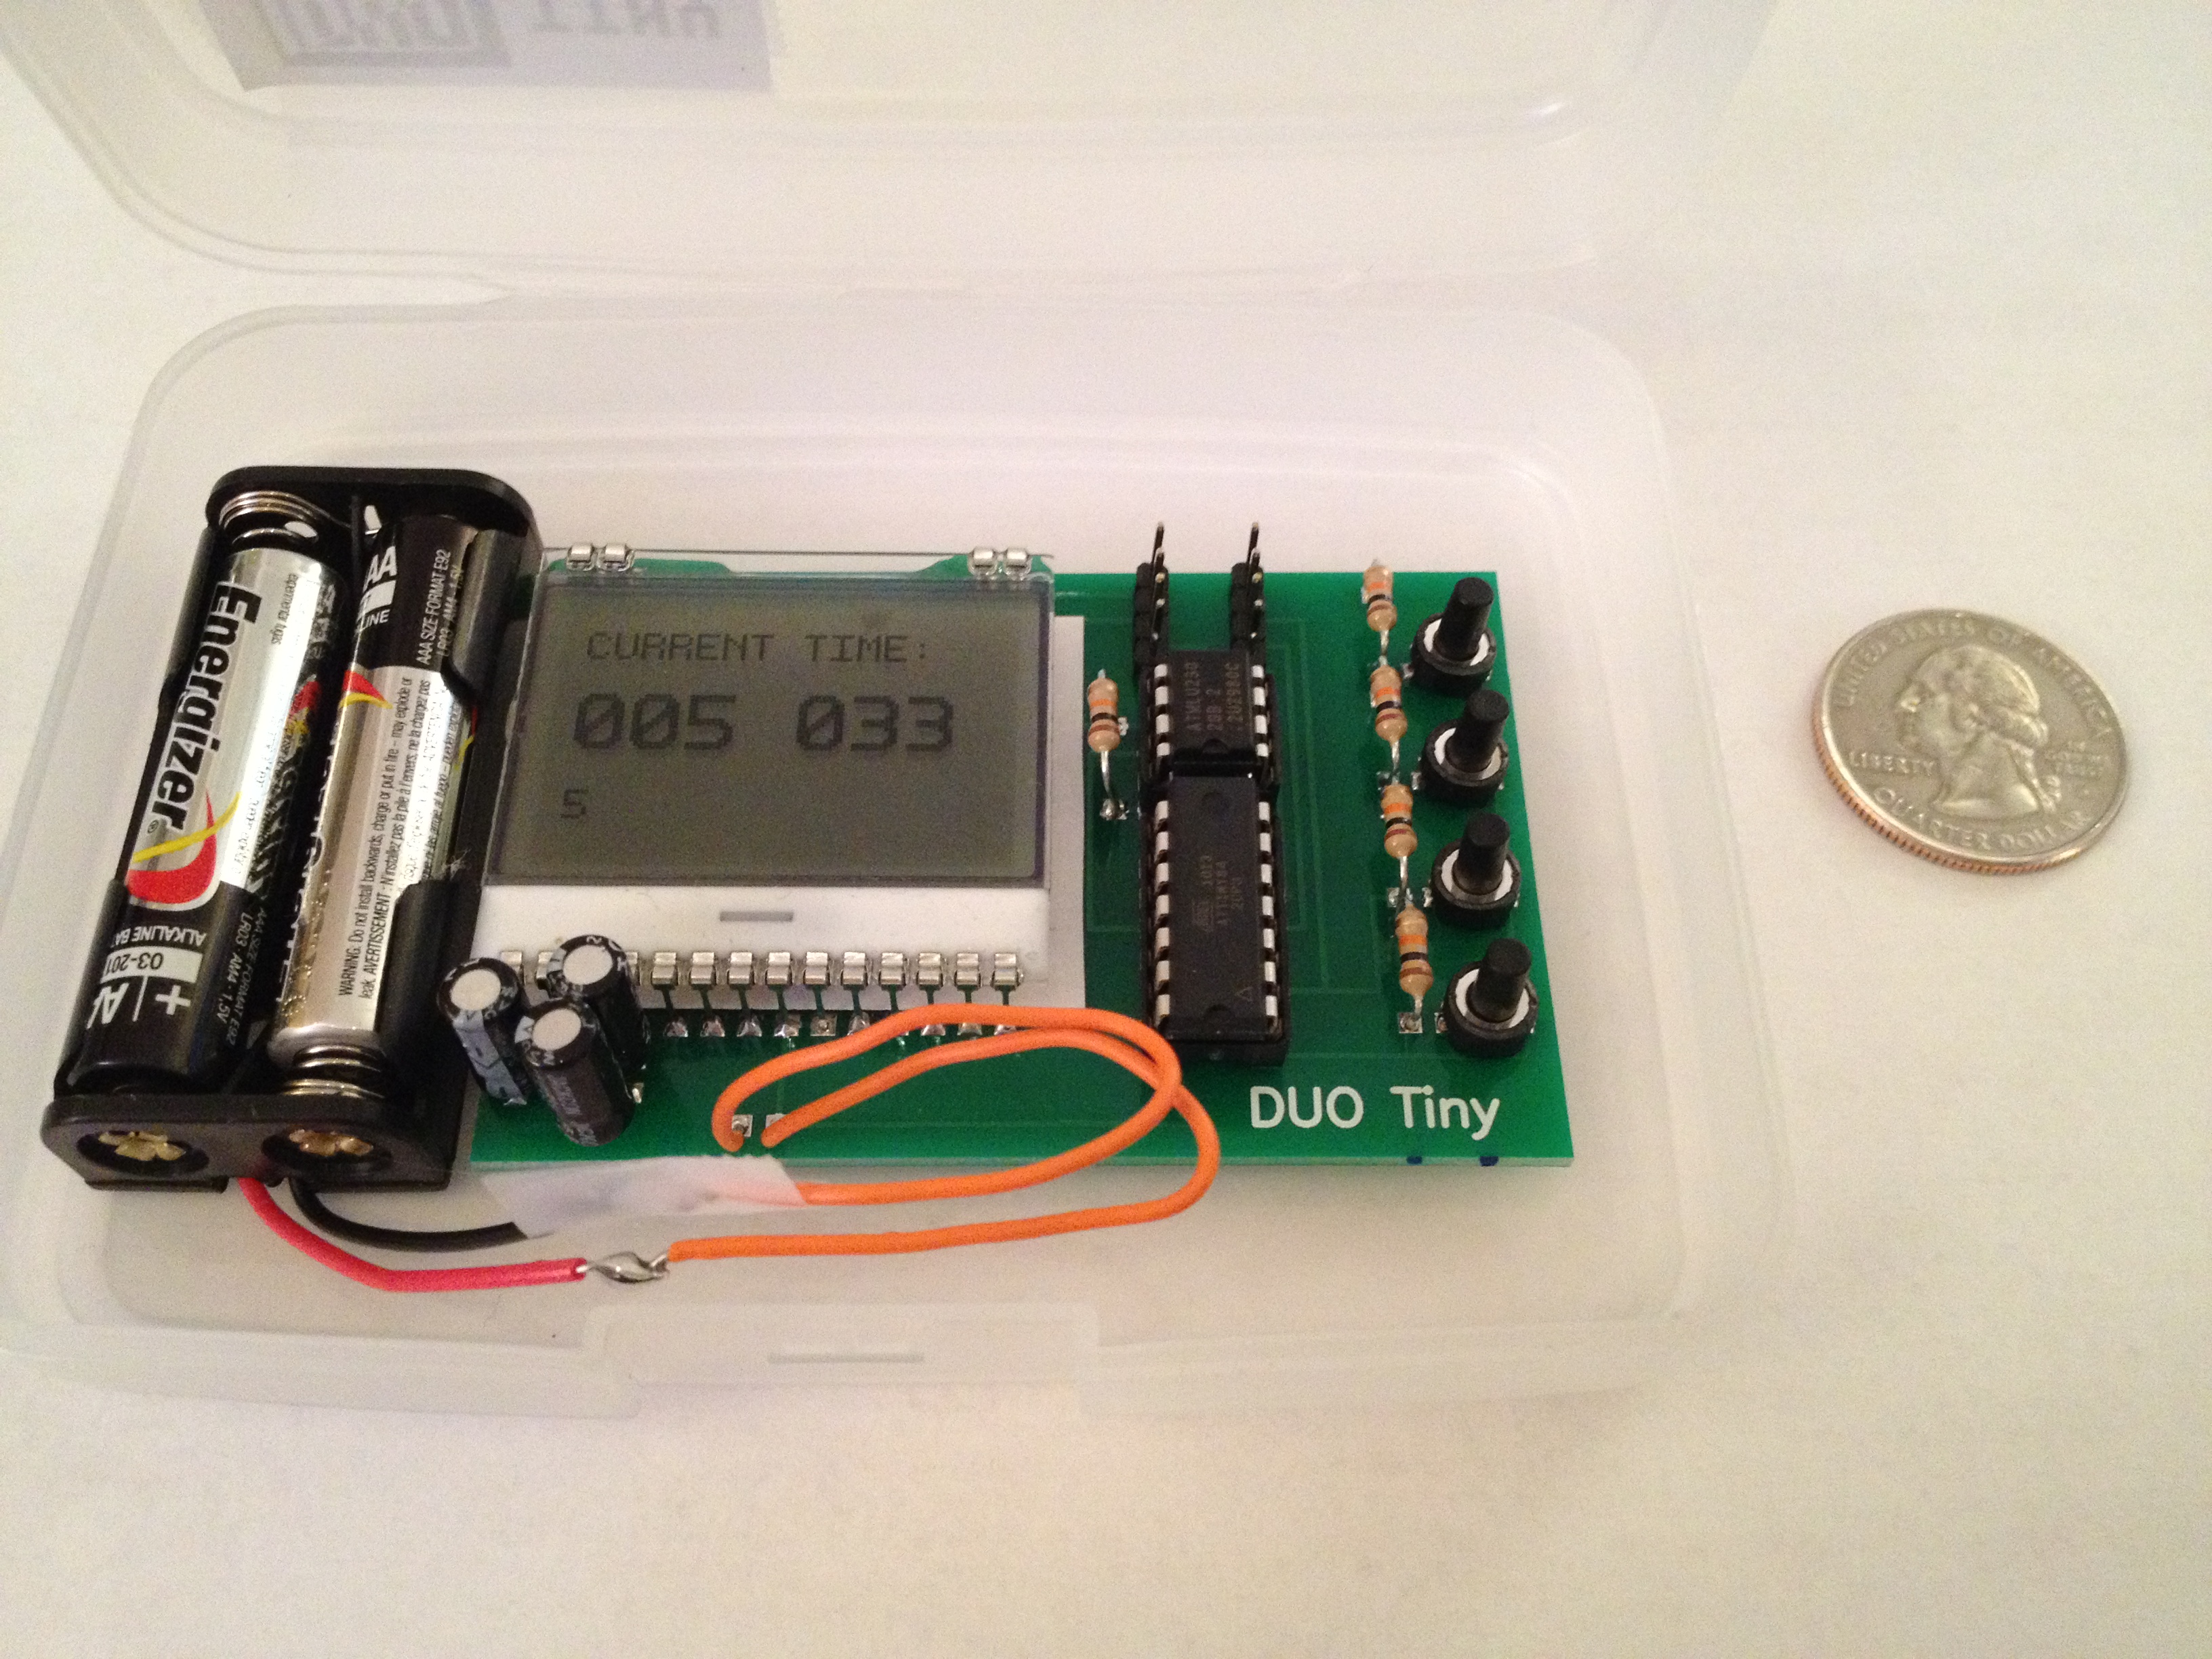
- Plug in both chips "upside down" with the semicircle notch closer to the front of the board. This notch is visible in the photo of the DUO Tiny.
- Be sure to place extra space between the board and LCD. The display can also be damaged by heat. I found this out the hard way! 5 mm of extra height should suffice.
- Orient the capacitors so their positive ends connect to pins 15, 18, and 19 on the LCD. These capacitors are important for the display to function.
If you supply power to your board right now, absolutely nothing will occur. We need to install the ATTiny code and software!
Connect the Arduino UNO to the DUO Tiny board by using the pin headers and pin sockets. Use the diagram below for reference.
ARDUINO PIN   LEFT HEADER   RIGHT HEADER   ARDUINO PIN

    13 ----------- O              O ----------- None

    12 ----------- O              O ----------- 4

    11 ----------- O              O ----------- 3

    10 ----------- O              O ----------- 2
On a laptop computer, install the Arduino development environment. By default, this application does not compile for the ATTiny. To add ATTiny support, visit this page and follow the instructions. I would avoid burning fuses in the ATTiny.
Incase that link ever dies, I have copied the instructions here:
I have found there to be a bug in the ATTiny support. For any sketch larger than 4 KB, the compiler will fail. To fix the problem, please visit this page
Again, incase the link dies, I have copied the information here:
After installing the plugin and patch, follow these instructions to install the DUO Tiny sketch onto the ATTiny:
- Open the Arduino development environment.
- Open File > Examples > ArduinoISP.
- Select Tools > Board > Arduino Uno (if it is not selected already).
- Plug the Arduino UNO board into your laptop with a USB 1.0 cable.
- Press the upload button on the ArduinoISP sketch to upload to the Arduino UNO. Your Arduino UNO will now act as a programmer for the ATTiny.
- Download the DUO Tiny sketches.
- Open "WatchComputer2.ino".
- In the Arduino development environment, open Tools > Board > ATTiny84 (internal 1 MHz clock).
- Plug in the left pin header of the DUO Tiny to the Arduino UNO (if you have not done so already) using the diagram shown earlier.
- Connect the DUO Tiny to ground and 3.3 volts on the Arduino. Do NOT use the batteries yet.
- Press the upload button on the WatchComputer2 sketch. The program will take a minute to load into the ATTiny. If everything was successful, the LCD should write the text "DUO TINY".
If nothing is displayed on the LCD, review all instructions and try again. If that fails, please contact me at esperantanaso at gmail.com.
Now you are ready to load DTPL programs into the DUO Tiny EEPROM:
- Plug in the right pin header of the DUO Tiny to the Arduino UNO (if you have not done so already) using the diagram shown earlier.
- On the DUO Tiny board, press and hold the top button for 5 seconds. This will reset the DUO Tiny; the DUO Tiny cannot read from the Arduino UNO while running programs.
- Open "ArduinoControl.ino" included in the tiny_sketches folder.
- Select Tools > Board > Arduino Uno.
- Upload the ArduinoControl sketch to the Arduino UNO.
- Open the Arduino console with Tools > Serial Monitor. You should see the text "Please enter a command: R or W."
- Follow the onscreen prompt to write data to the DUO Tiny EEPROM. Find DTPL code in this file. Do not enter more than 500 characters at a time. The Arduino UNO does not have a lot of memory to store text. To divide text into pieces, use this utility.
- When you have written some programs into the DUO Tiny, press the bottom button on the DUO Tiny board. Execution will begin at address 0.
I recommend that you first try writing and reading a small amount of text. This will let you confirm that the DUO Tiny is functioning properly. If the Arduino UNO reports bad data, check your connections and read this document again.
If you build your own DUO Tiny, I would love to see a photo! My email address is esperantanaso at gmail. You should also send me an email if you have any problems. Good luck!